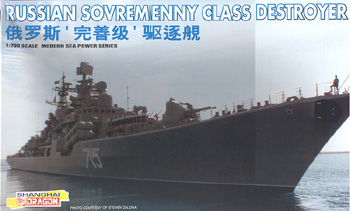
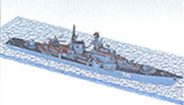
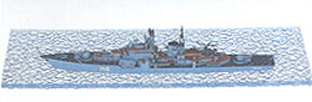
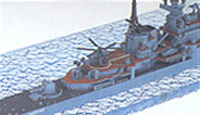
Sovremenny Class Destroyer
Shanghai Dragon - 1/700
By: Mike Dunn
 Over the
past 18 months or so, my passion for modern Royal Navy vessels has expanded to
Cold War and after Soviet naval vessels. You can imaging my surprise and pleasure,
when a friend sent me this (tricky to get in the UK), kit as a Christmas present.Let's
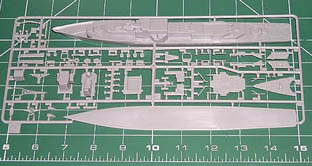
start with the large sprue. Eight parts are unused here; a small radar, six of
what appear to be ready-load boxes; and the base (which you would use if you don't
put it on the perspex). Looking at the remainder of the sprue, all the parts
are crisply moulded - in fact, I can't see any excess at all.
Over the
past 18 months or so, my passion for modern Royal Navy vessels has expanded to
Cold War and after Soviet naval vessels. You can imaging my surprise and pleasure,
when a friend sent me this (tricky to get in the UK), kit as a Christmas present.Let's
start with the large sprue. Eight parts are unused here; a small radar, six of
what appear to be ready-load boxes; and the base (which you would use if you don't
put it on the perspex). Looking at the remainder of the sprue, all the parts
are crisply moulded - in fact, I can't see any excess at all. 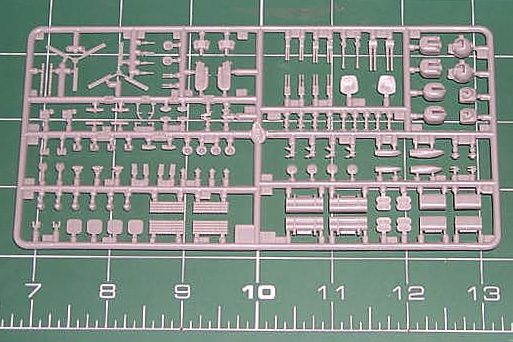 Parts
on this sprue include the main part of the (waterline) hull and superstructure
(almost 9" long), several small deck parts, several higher parts of the superstructure
e.g. the bridge and masts, as well as some weapons and various detailing parts.
Moving to the smaller sprue, this again is crisp with no flashing. While
a good 50% of this sprue will be unused on this kit, giving you a lot for
your spares box, those that are used are well-made. Lastly, on the plastics side,
is the perspex "sea". This is a sheet of transparent cyan (similar to the background
colour we use in SMML) of dimensions 5" by 11", with the "sea" being in the form
of raised "bubbles" to give the effect.
Parts
on this sprue include the main part of the (waterline) hull and superstructure
(almost 9" long), several small deck parts, several higher parts of the superstructure
e.g. the bridge and masts, as well as some weapons and various detailing parts.
Moving to the smaller sprue, this again is crisp with no flashing. While
a good 50% of this sprue will be unused on this kit, giving you a lot for
your spares box, those that are used are well-made. Lastly, on the plastics side,
is the perspex "sea". This is a sheet of transparent cyan (similar to the background
colour we use in SMML) of dimensions 5" by 11", with the "sea" being in the form
of raised "bubbles" to give the effect. 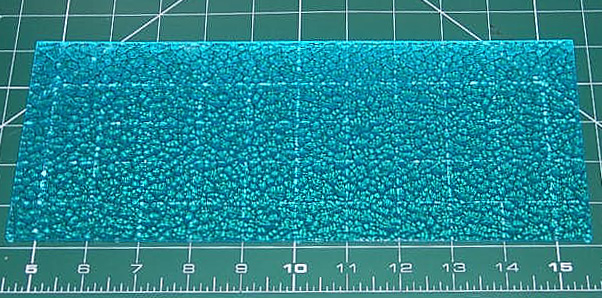 Moving
over to the decals, this is a small sheet with six white decals on - the first
two are a choice of names for the ship (two of Bystry and two of Besstrashny),
the third is the heli-deck markings, the fourth a pair of red stars for the bow,
followed by a pair of pennant numbers for each name. The fields around the names
and heli-deck are tight; the others will require trimming.
Moving
over to the decals, this is a small sheet with six white decals on - the first
two are a choice of names for the ship (two of Bystry and two of Besstrashny),
the third is the heli-deck markings, the fourth a pair of red stars for the bow,
followed by a pair of pennant numbers for each name. The fields around the names
and heli-deck are tight; the others will require trimming. 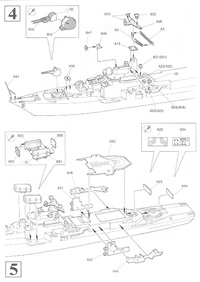 The instructions
can make or break a ship, especially when a lot of parts are unused. As mentioned
at the top, this is a long single sheet, folded to give eight pages. Page 1 has
a copy of the box photo, with diagrams of the sprues underneath, showing what
parts are unused. Page 2 starts with the usual multi-lingual warnings, explanation
of icons and paint list (unfortunately in Gunze Sangyo and Italeri only). After
this, the first stage in assembly is shown, with the start of the bow detailing.
Page 3 has a further two stages relating to the bow. Page 4 has two more stages,
finishing the bow, and starting the stern detailing. Page 5 has two more stages
on the stern, with Page 6 having two stages finishing this, and one on assembling
the helicopter. Page 7 tells you to put the finished ship on the flat side of
the perspex, and has a photo of this as well as some instructions relating to
decals. Page 8 covers the markings and painting of the ship, in side and plan
view - for some aspects of the detailing in the previous pages painting guides
are included, but this page covers the ship as a whole, and also shows the locations
of the decals.
The instructions
can make or break a ship, especially when a lot of parts are unused. As mentioned
at the top, this is a long single sheet, folded to give eight pages. Page 1 has
a copy of the box photo, with diagrams of the sprues underneath, showing what
parts are unused. Page 2 starts with the usual multi-lingual warnings, explanation
of icons and paint list (unfortunately in Gunze Sangyo and Italeri only). After
this, the first stage in assembly is shown, with the start of the bow detailing.
Page 3 has a further two stages relating to the bow. Page 4 has two more stages,
finishing the bow, and starting the stern detailing. Page 5 has two more stages
on the stern, with Page 6 having two stages finishing this, and one on assembling
the helicopter. Page 7 tells you to put the finished ship on the flat side of
the perspex, and has a photo of this as well as some instructions relating to
decals. Page 8 covers the markings and painting of the ship, in side and plan
view - for some aspects of the detailing in the previous pages painting guides
are included, but this page covers the ship as a whole, and also shows the locations
of the decals.
 |
 |
 |